Creating Sales Channels: Websites
Sales channels in Sellista are avenues through which you can sell your products. One of the primary sales channels is creating a website. Here’s how you can set up your website in Sellista.
Steps to Create a Website Sales Channel
-
Access Sales Channels
- From the Sellista dashboard, navigate to the sidebar and click on Sales Channels.

-
Create New Website
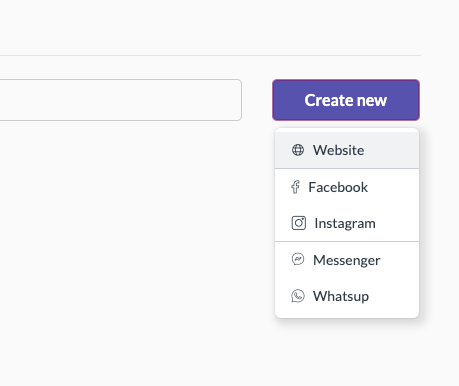
- Click the Create new button. A drop-down menu will appear with various options. Select Website to begin the website creation process.

-
Basic Store Information
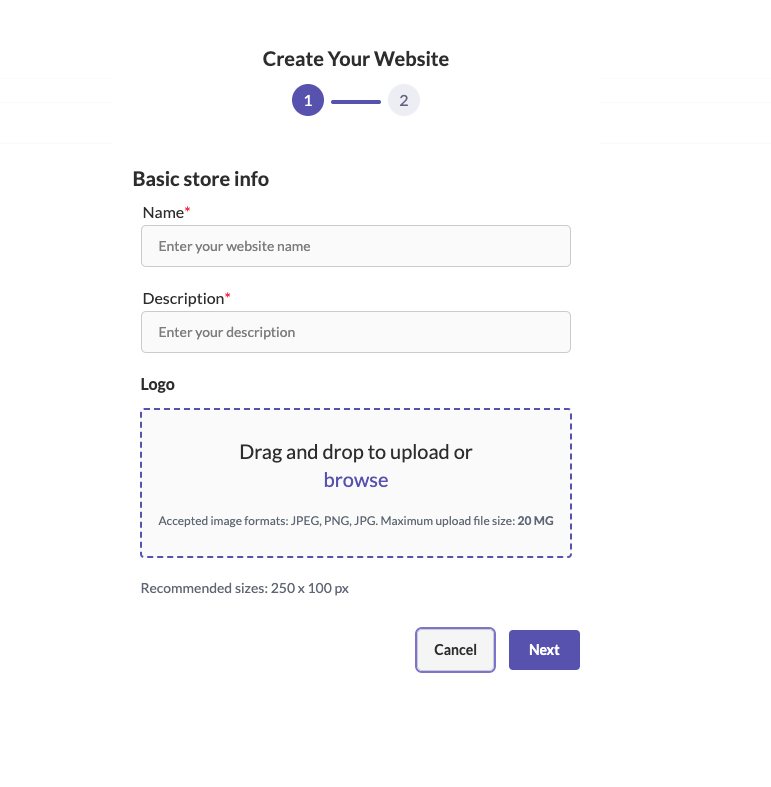
- Enter the basic details of your website:
- Name: The name of your website.
- Description: A brief description of what your website is about.
- Logo: Upload a logo for your website. You can either drag and drop the image or browse your files to upload it. Accepted formats include JPEG, PNG, and JPG with a maximum size of 20MB. The recommended size is 250 x 100 px.
- Enter the basic details of your website:

-
Branding & Design
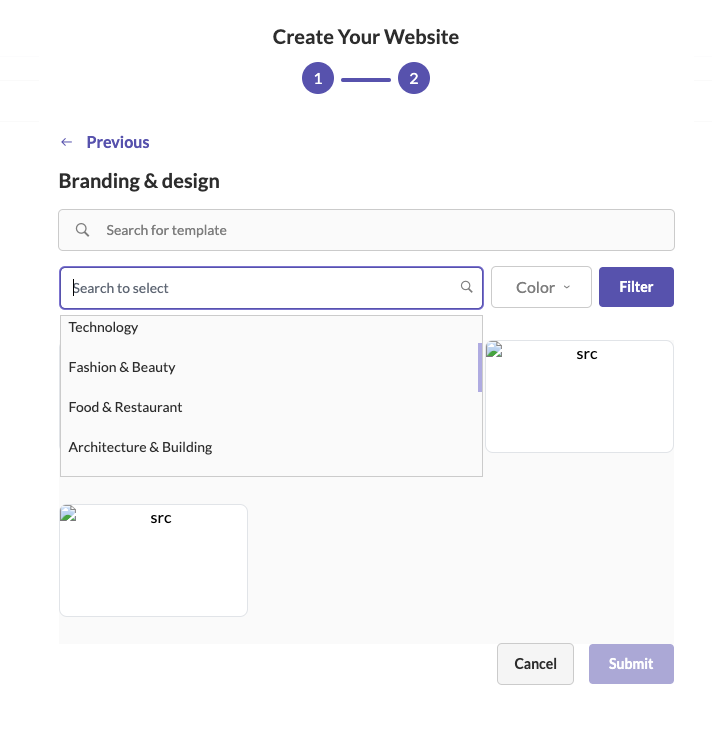
- Choose a template for your website from the available options. You can filter templates based on color and other attributes to find one that best suits your brand’s identity.

-
Submit
- After selecting the template, click Submit to finalize the creation of your website.
Publishing Your Website
Once your website is created, it is not automatically published. To make your website live, follow these steps:
- Access Sales Channels
Return to the Sales Channels section from the sidebar.
- Toggle Website Activation
Locate your newly created website in the list. In front of the website name, you will see a toggle button. Press the toggle button to activate your website.
- Website Generation and Optimization
Once you press the toggle button, Sellista will generate and optimize your website. This process ensures that your website is ready for visitors.
- Website Availability
After the generation and optimization process is complete, your website will be available online under the URL: [your website name].sellista.shop.
Managing Your Website
-
Editing and Customizing Your Website
- Click "Edit" under the website's name in the Sales Channels list. This will take you to the Sellista website builder where you can:
- Customize Themes: Modify the overall look and feel of your website by selecting and adjusting themes.
- Add Components: Incorporate various components such as e-commerce features, contact forms, and more.
- Customize Code (Advanced): For users with coding knowledge, you can directly edit the website's code to make advanced customizations. We will cover the details of using the website builder in a later section.
- Click "Edit" under the website's name in the Sales Channels list. This will take you to the Sellista website builder where you can:
-
Preview
- You can preview your website by clicking the Preview option. This allows you to see how your website will look to visitors.
-
Settings
- Under the Settings option, you can configure various aspects of your website, including SEO settings, domain settings, and more.
-
Delete
- If you need to remove the website, you can click Delete. Be cautious, as this will remove the website permanently.