Managing Orders
Overview
Managing orders efficiently is crucial for any e-commerce business. In Sellista, the "Orders" section allows you to monitor and manage all your orders with ease. You can add new orders, assign products to orders, manage customer information, apply discounts, and calculate shipping costs—all from a centralized location. Below is a comprehensive guide on how to manage orders in Sellista.
Accessing Orders
To access the orders section:
- Navigate to the Order & Shipping menu in the Sellista dashboard.
- Select Order List to view all your orders.
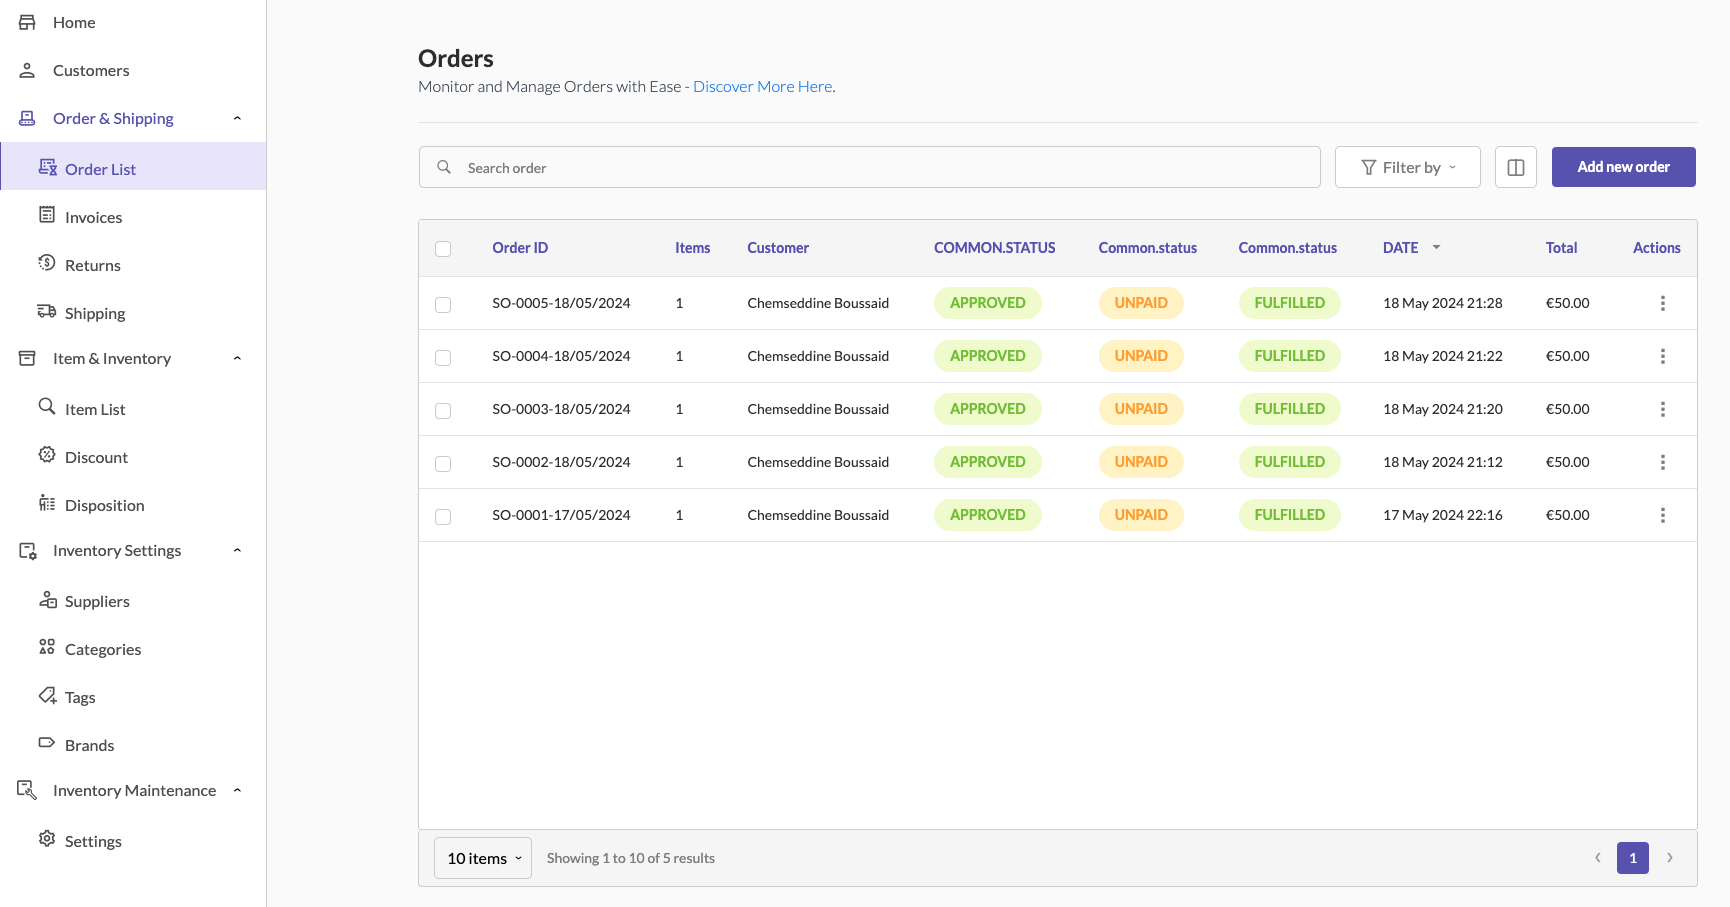
The order list displays key details such as order ID, items, customer, status, date, total amount, and actions.
Adding a New Order
To add a new order:
- Click the Add new order button at the top right corner of the order list page.
- A modal window will appear for adding the order details.
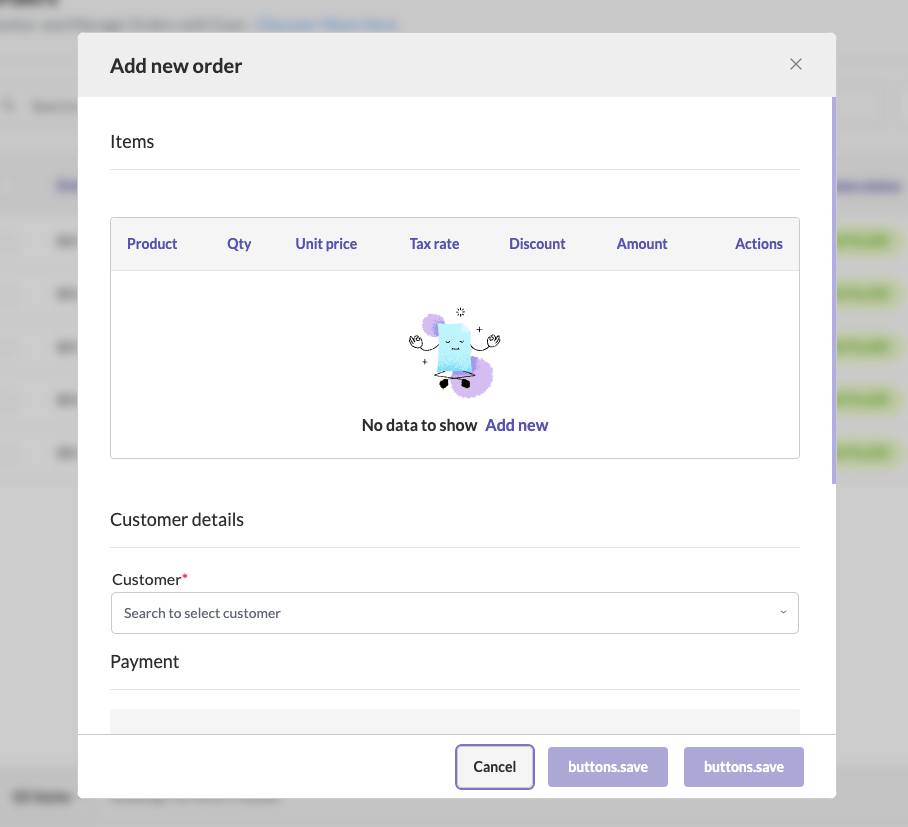
Adding Customer Details
Customers can be added to an order manually or automatically:
- Manual Addition: In the Customer details section of the new order modal, search for an existing customer using the search bar. If the customer does not exist, click + New Customer to add a new customer. Fill in the customer's information, including first name, last name, company (optional), email, phone number, and address details. Click "Save" to add the customer.
- Automatic Creation: When a customer makes a purchase from your website or any connected sales channel, their information is automatically captured, and a customer profile is created. The order is then automatically added to the Order List in Sellista.
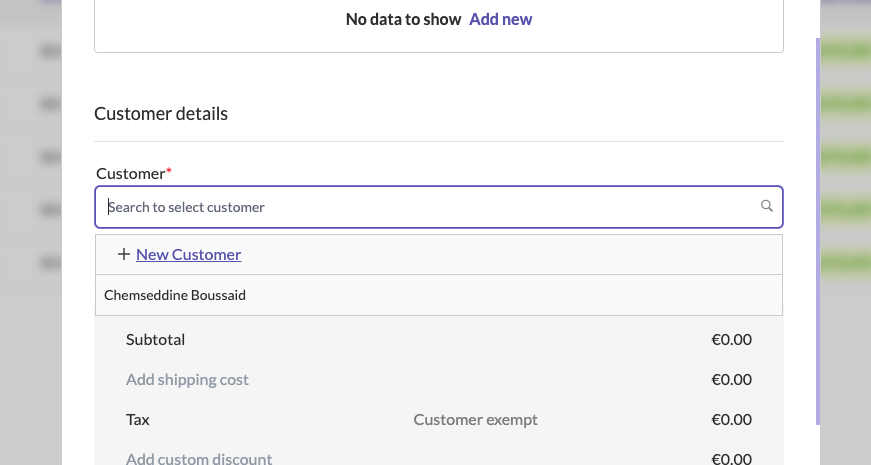
Adding Products to an Order
To add products to an order:
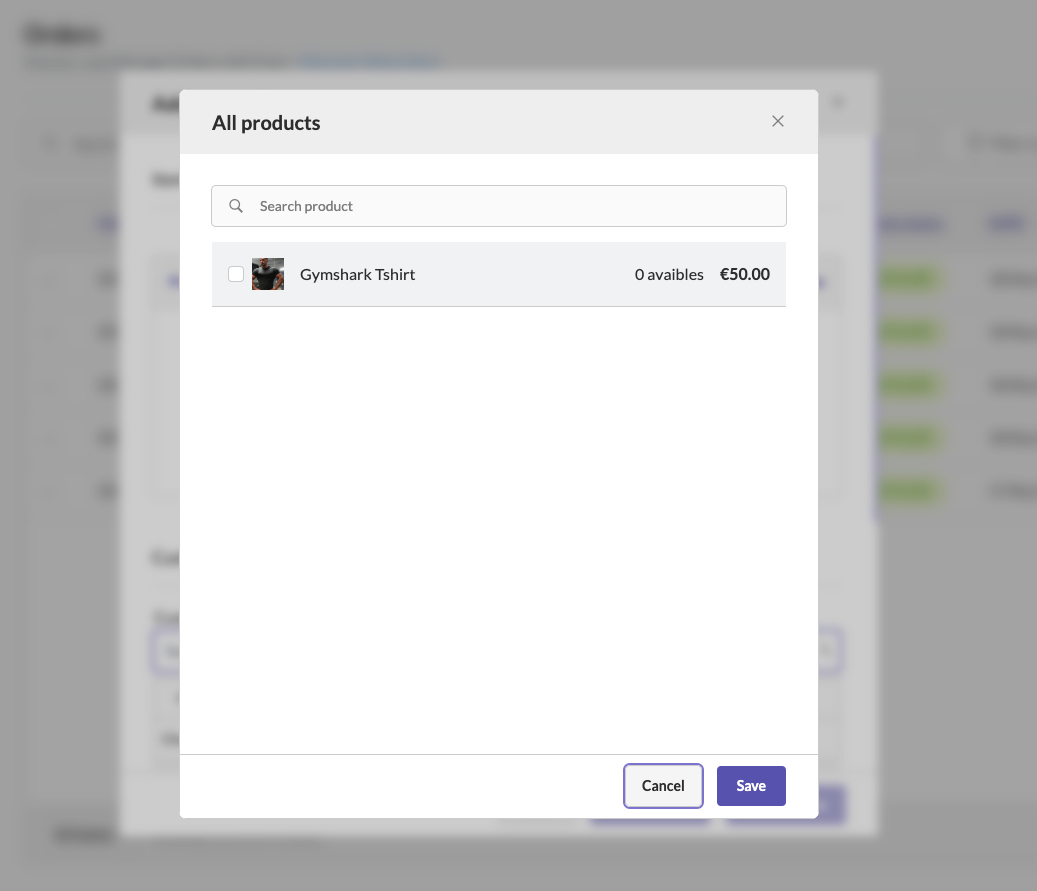
- In the Items section of the new order modal, click Add new to select a product.
- Search for the product you want to add.
- Select the product and click Save.
- Specify the quantity, unit price, tax rate, and discount if applicable.
- The product will be added to the order list with its details.
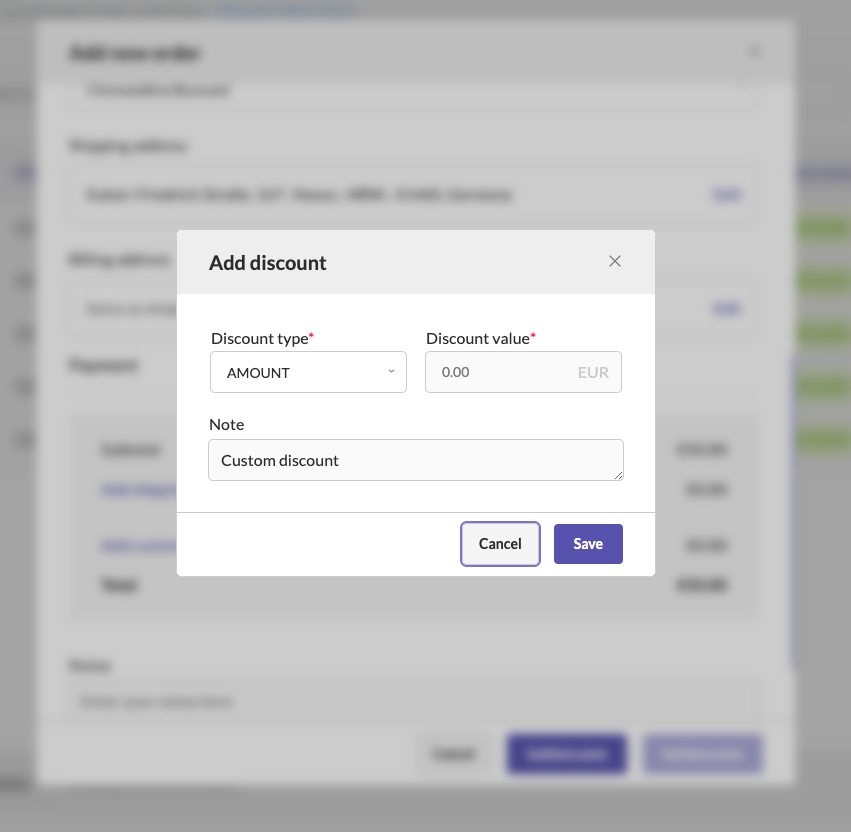
Applying Discounts
To apply a discount to an order:
- In the Payment section, click Add custom discount.
- Select the discount type (e.g., amount or percentage).
- Enter the discount value and a note if needed.
- Click Save to apply the discount.
Adding Shipping Details
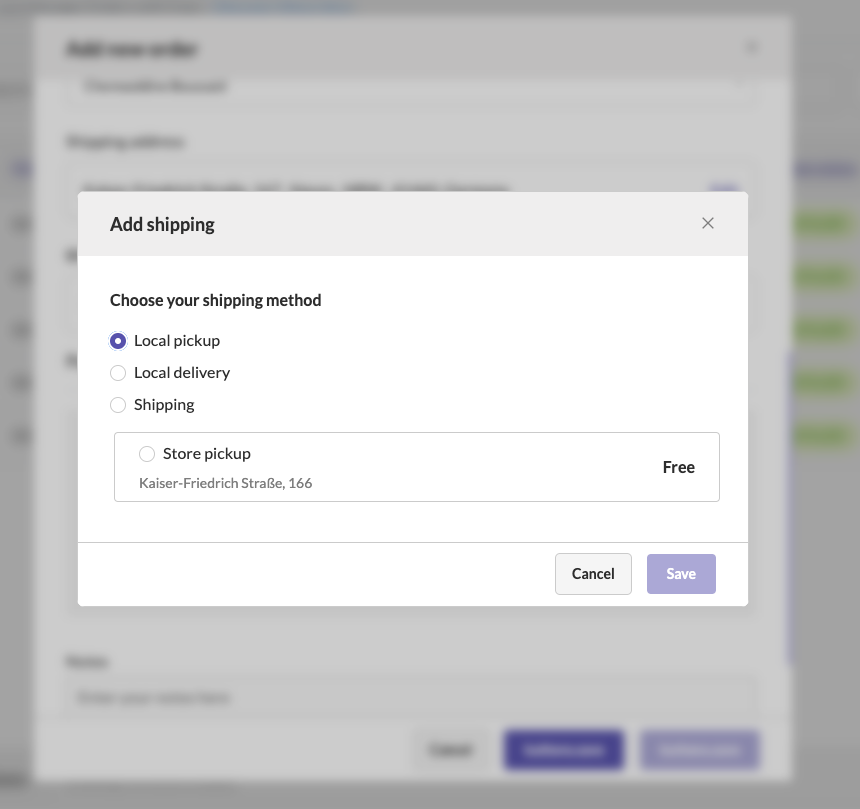
To add shipping details:
- In the Payment section, click Add shipping cost.
- Enter the shipping cost.
- Click Save to add the shipping cost to the order total.
Setting Payment Status
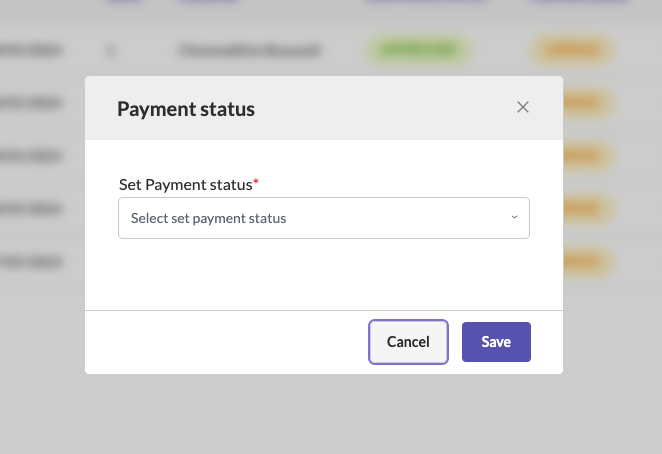
To set the payment status of an order:
- Click the three dots in the Actions column of the order you want to update.
- Select Set payment status.
- Choose the appropriate payment status (e.g., partially paid, paid).
- Click Save to update the status.
Setting Fulfillment Status
To set the fulfillment status of an order:
- Click the three dots in the Actions column of the order you want to update.
- Select Set fulfillment status.
- Choose the appropriate fulfillment status (e.g., fulfilled, unfulfilled).
- Click Save to update the status.
Finalizing and Saving the Order
After adding all necessary details (customer, products, discounts, and shipping):
- Review the order summary in the new order modal.
- Click Save to finalize and create the order.
Automatic Invoice Creation
When an order is created and saved in Sellista, a new invoice is automatically generated and added to the "Invoices" section. This ensures that each order has a corresponding invoice for record-keeping and customer reference. (We will cover the Invoices section in detail later.)
By following these steps, you can efficiently manage orders in Sellista, ensuring that all customer and product information is accurately recorded and that any applicable discounts, shipping costs, and statuses are included. This streamlined order management process helps improve the efficiency of your e-commerce operations, leading to better customer satisfaction and business growth. Additionally, the automatic creation of orders and customer profiles from your sales channels further simplifies order management and ensures all purchases are tracked seamlessly.